How often should I replace brake rubber seals? It is a practical question with no universal calendar answer. In 2026, many technicians inspect these seals during every brake-fluid service, caliper overhaul, or hydraulic repair. Age, heat, moisture, road salt, and contaminated fluid can weaken rubber faster than mileage suggests. A car driven rarely may still have brittle seals.
Automotive service journalist Andrew Markel has offered this useful principle: “Rubber parts rarely fail from mileage alone; age, heat, and contamination matter just as much.” That advice fits brake systems closely. A seal may appear smooth outside while losing flexibility inside its groove. Look for swelling, cracks, hard edges, fluid seepage, or a piston that retracts slowly. Small details matter. A damp caliper boot deserves attention.
There is no perfect replacement interval. Some manufacturers provide inspection or overhaul guidance, while others expect replacement only when damage or leakage appears. That can feel unsatisfying. It is still safer than guessing by age alone. In many vehicles, seals can last several years, but harsh climates and neglected brake fluid may shorten their service life. This guide will examine realistic inspection intervals, warning signs, material differences, and 2026 maintenance recommendations. It will also explain when replacement is sensible and when a complete caliper rebuild is the more reliable choice. Always verify the vehicle’s service manual and use seals designed for the correct brake-fluid specification.
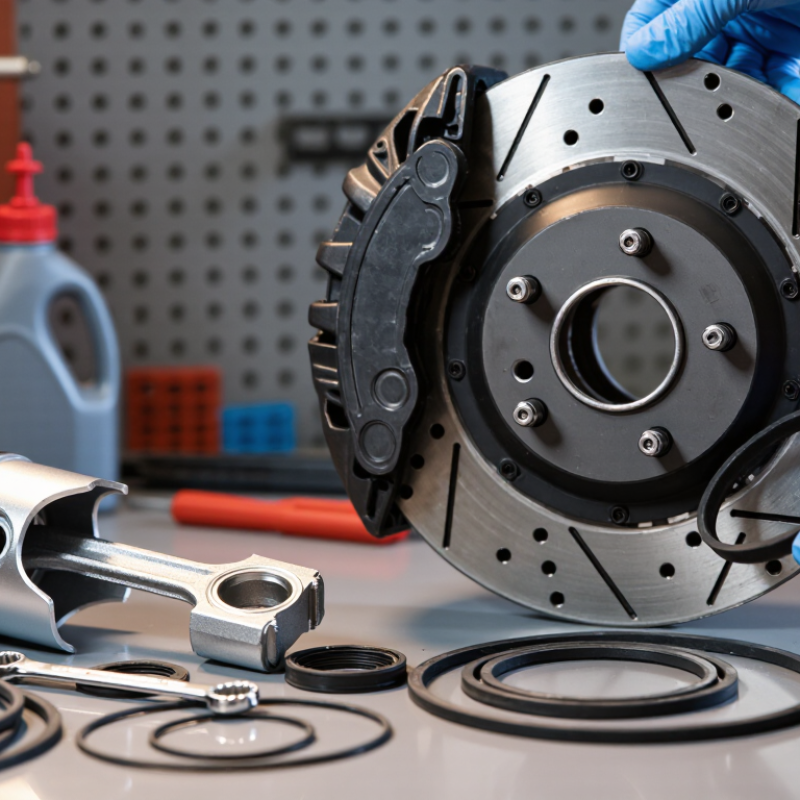
How Often Should You Replace Brake Rubber Seals in 2026?
Brake rubber seals are flexible, fluid-resistant parts inside calipers, wheel cylinders, master cylinders, and hoses. They keep brake fluid contained while allowing pistons to move smoothly. Their service life depends on material quality, heat, moisture, mileage, storage, and fluid condition. No universal replacement interval exists.
A seal may last many years without a fixed calendar deadline. However, inspection becomes necessary when you notice fluid loss, a soft pedal, uneven braking, piston sticking, or wetness near a fitting. Cracks, swelling, hard edges, and a shiny, flattened surface also indicate deterioration. During brake repairs, a qualified technician should check every exposed seal, not only the visibly damaged one.
In workshop inspections, seals often fail after contamination or repeated heat cycles, rather than simple age. I once assumed an old seal was safe because it looked intact; its inner lip had already lost flexibility. That judgment was too casual. Follow the vehicle’s service information and use seals compatible with the specified brake fluid. Replace questionable parts during disassembly, because reused rubber may not reseat reliably. A careful inspection record, including mileage and fluid condition, can support a better replacement decision.
How Often Should You Replace Brake Rubber Seals in 2026?
There is no universal replacement interval for brake rubber seals. Replacement is normally based on inspection results, brake-fluid leakage, visible deterioration, seal removal during an overhaul, or a vehicle-specific service instruction.
How Often Should You Replace Brake Rubber Seals in 2026?
Brake rubber seals do not have one universal replacement interval. Heat, moisture, contaminated fluid, and long storage can shorten their service life. During a caliper, wheel cylinder, or master cylinder rebuild, replace the seals listed in the current OEM service data. Do not reinstall old rubber simply because it looks flexible. Small cracks may hide inside the sealing lip. A clean-looking seal can still cause pressure loss.
Service manuals usually identify the correct seal type, installation direction, lubrication method, and inspection limits. Follow those details closely. The piston bore, groove, and dust boot also need careful inspection. Rust around a groove can damage a new seal within weeks. Use clean brake fluid or the specified assembly lubricant, and keep all parts free from grit. In workshop practice, rushing this inspection creates repeat repairs. It is an easy mistake to make.
Tips: Record the vehicle’s mileage, fluid condition, and rebuild date. Replace seals whenever service data requires it, especially after heat damage or fluid contamination. Never mix unknown seal materials. A fixed five-year rule sounds convenient, but it is often inaccurate. Service history may be incomplete, and that uncertainty deserves attention. When the manual is unclear, consult qualified technical support before choosing a replacement interval.
Brake rubber seals should not be replaced by calendar age alone. In 2026, inspect them during every brake-fluid service, hydraulic repair, or master-cylinder rebuild. Replace them sooner when you find swelling, cracks, softness, leakage, or a sticky pedal. Heat matters. So does moisture.
Fluid chemistry must match the seal material. NHTSA’s FMVSS No. 116 lists minimum dry and wet boiling points for glycol-based fluids: DOT 3 reaches 205°C and 140°C, while DOT 4 reaches 230°C and 155°C. DOT 5.1 requires 260°C dry and 180°C wet performance. These fluids generally require rubber compounds designed for glycol exposure, commonly EPDM-type formulations. Silicone DOT 5 is chemically different and needs compatible seals. Never assume a similar-looking seal will work.
Check the reservoir label, service manual, and seal specification before installation. A seal that fits the groove can still fail chemically. I have seen this mistake create swelling after only a short service interval. That detail is easy to miss.
NHTSA’s FMVSS No. 116 also distinguishes silicone-based DOT 5 from DOT 3, DOT 4, and DOT 5.1 fluids. Do not mix fluid families unless the vehicle documentation expressly permits it. During inspection, compare the old seal with a new one for diameter, edge sharpness, and surface texture. Replace the seal when contamination remains, even without visible damage. A fixed five-year rule sounds convenient, but mileage, temperature, storage, and fluid moisture can change the answer.
Brake rubber seals do not follow one universal replacement date. Their condition matters more than the calendar. Inspect them at every brake service, especially during pad, rotor, fluid, or caliper work. Look for wetness around pistons, bleeder screws, master cylinders, and wheel cylinders. Even a small fluid film deserves attention.
Swollen seals may make pistons stick, causing uneven pad wear or a hot wheel. Cracks can appear like thin gray lines. Hardened rubber may feel less flexible and fail under pressure. Brake fluid contamination, heat, moisture, and long storage can accelerate deterioration. In practice, technicians should replace a seal when leakage, swelling, cracking, hardening, distortion, or damaged sealing surfaces appear. Follow the vehicle manufacturer’s service guidance and use compatible replacement parts. Guessing by age alone is unreliable.
Tips: Clean the area before inspection. Fresh fluid can hide an older leak. Press the brake pedal gently and check for renewed dampness. Compare both sides of the axle. A single damaged seal may indicate heat or contamination elsewhere. Do not reuse a seal that looks acceptable after removal; removal can stretch it. I have learned that visual checks can miss early hardening, so inspection by touch and careful movement matters. Still, touch is not a laboratory test. When pedal feel changes, fluid drops, or a wheel stays hot, stop driving and arrange a qualified brake inspection.
Brake rubber seals rarely follow a perfect calendar. Replace them when inspection shows swelling, cracking, leakage, or loss of elasticity. Heat, moisture, contaminated fluid, and long storage can shorten their service life. A calendar-only rule sounds tidy, but it is often wrong.
After seal replacement, perform the vehicle maker’s OEM pressure test. Use the specified pressure, hold time, and test sequence. A firm pedal is not proof of a successful repair. Pressure loss may reveal a loose connection, trapped air, or internal bypass. Check around the master cylinder, calipers, wheel cylinders, and flexible hoses with a dry inspection cloth. Small leaks can hide behind dust.
Fluid verification must follow FMVSS No. 116 requirements. The standard lists minimum dry and wet boiling points: DOT 3 requires 205°C and 140°C, while DOT 4 requires 230°C and 155°C. DOT 5.1 requires 260°C and 180°C. These figures show why fluid type and moisture condition matter. Color alone proves little. Use a documented boiling-point or moisture test, and compare results with the vehicle’s service specification. SAE brake-fluid standards provide additional technical references. One practical weakness remains: test devices can be inaccurate when poorly maintained. Record the instrument, result, date, and replacement decision. Then recheck pedal travel after the vehicle cools.
No universal replacement interval exists. Inspect them during brake-fluid service or hydraulic repairs. Mileage, heat, moisture, and fluid condition matter more than calendar age.
Watch for fluid loss, a soft pedal, uneven braking, or a sticking piston. Wetness near a fitting also matters. Small leaks can hide behind dust.
Check for cracks, swelling, hardened edges, and flattened shiny surfaces. Compare the old seal with a new seal. Their edges and textures should look similar.
Possibly, but appearance can mislead. An inner lip may lose flexibility without visible damage. I once trusted an old seal too quickly. That judgment was careless.
No. Glycol-based fluids usually require compatible EPDM-type seal materials. Silicone-based fluid is chemically different. Never choose a seal by appearance alone.
Read the reservoir label and service information. Confirm the fluid type and seal specification. Check diameter, groove fit, edge sharpness, and surface texture.
Reusing them is risky after disassembly. Rubber may not reseat reliably. Replace seals showing contamination, swelling, cracks, softness, or leakage. It costs less than repeating the repair.
Follow the vehicle maker’s pressure-test procedure. Check the required pressure, hold time, and test sequence. Inspect connections with a dry cloth. A firm pedal alone proves little.
Do not rely on color alone. Use a documented boiling-point or moisture test. Record the instrument, result, date, and decision. Poorly maintained testers can mislead.
There is no universal replacement interval for brake rubber seals. The answer to “How often should I replace brake rubber seals” depends on the vehicle’s service information, brake design, operating conditions, and seal condition. In most cases, seals should be replaced during a caliper or wheel-cylinder rebuild, or whenever inspection reveals leakage, swelling, cracks, surface damage, or hardening. Following the applicable original equipment service data helps ensure the correct parts and procedures are used.
Seal material must also be compatible with the specified brake fluid, including FMVSS No. 116 DOT 3, DOT 4, or DOT 5.1 fluids; these should not be mixed with incompatible fluid types. Inspect the seals at every brake service, especially when components are disassembled. After repairs, confirm correct assembly with the recommended pressure tests and verify that the fluid meets the required FMVSS specifications. Regular inspections and proper fluid selection are more reliable than replacing seals on a fixed calendar schedule.

Zizel Auto